How to Inspect ATV Drive Belts for Wear: A Step-by-Step Guide
How to Inspect ATV Drive Belts for Wear: A Step-by-Step Guide
ATV drive belts work hard—especially in Flagstaff, Arizona, where steep climbs, loose terrain, and elevation changes put constant stress on the CVT system. A worn or failing drive belt can leave you stranded miles from the trailhead, often without warning.
This step-by-step guide shows you how to inspect your ATV drive belt for wear, what warning signs to look for, and when it’s time to replace it.
Why Drive Belt Inspections Matter in Flagstaff
Northern Arizona riding conditions accelerate belt wear due to:
Frequent elevation changes
High engine load on climbs
Heat buildup inside the CVT housing
Dust and debris intrusion
Regular inspections help prevent sudden belt failure and expensive secondary damage.
Tools You’ll Need
Flashlight or headlamp
Basic socket set
Clean rag
Owner’s manual (for torque specs and belt measurements)
Step-by-Step: How to Inspect an ATV Drive Belt
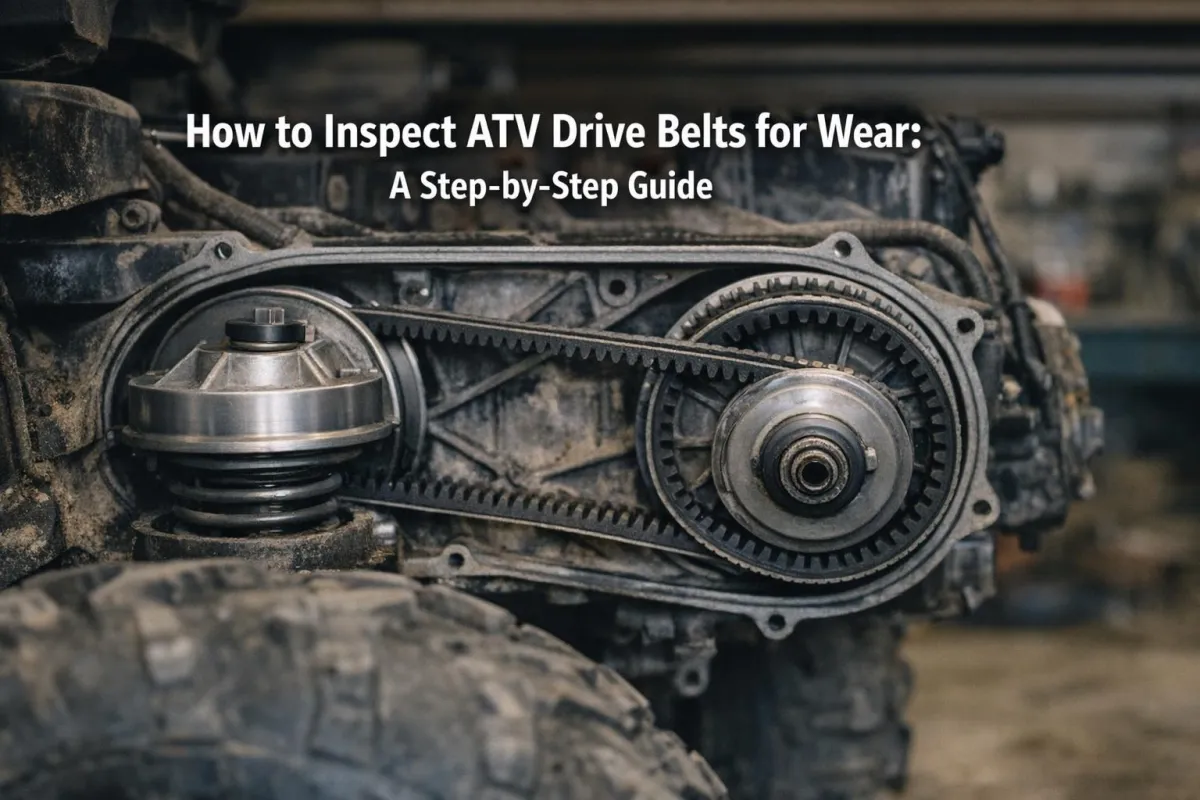
1. Access the CVT Belt Housing
Park the ATV on level ground
Allow the engine to cool completely
Remove the CVT cover using the appropriate socket
Keep track of bolts—they’re often different lengths.
2. Perform a Visual Inspection
Use a flashlight to examine the belt carefully.
Look for:
Cracks along the belt surface
Frayed or glazed edges
Missing or rounded cogs (teeth)
Burn marks or discoloration
Any of these signs indicate the belt is nearing the end of its life.
3. Check Belt Width and Alignment
Compare belt width to manufacturer specs
Look for uneven wear across the belt
A belt that’s too narrow or worn unevenly won’t grip properly and can slip under load.
4. Feel the Belt for Soft Spots or Irregularities
Run your fingers along the belt surface.
Watch for:
Soft or spongy areas
Hard, brittle sections
Uneven thickness
Changes in texture usually mean heat damage or internal degradation.
5. Inspect the Clutch Sheaves
While the belt is exposed, check the primary and secondary clutch faces.
Check for:
Grooves or scoring
Built-up residue or glazing
Damaged clutch surfaces can destroy a new belt quickly if left unaddressed.
6. Reinstall the Cover and Test
Reinstall the CVT cover using proper torque
Start the ATV and listen for unusual noises
Perform a short test ride
Smooth engagement and no slipping indicate the belt is still serviceable.
How Often Should You Inspect ATV Drive Belts?
For Flagstaff and Northern Arizona riders:
Every 500–1,000 miles
After aggressive riding or deep dust
Immediately if you notice slipping, burning smells, or power loss
Preventative inspections reduce trail-side failures.
Key Takeaways
Drive belts wear faster in high-load terrain
Cracks, fraying, and soft spots signal replacement time
Belt width and texture matter as much as appearance
Clutch condition affects belt lifespan
Routine checks prevent sudden breakdowns
Need Drive Belt Service in Flagstaff?
If you’re unsure about belt condition or want professional inspection and replacement, trust Mountainside Motorcycle Services for expert CVT diagnostics and reliable repairs.
📞 Call: 928-600-7602
🌐 Visit: https://mountainsidemotorcycleservices.com